
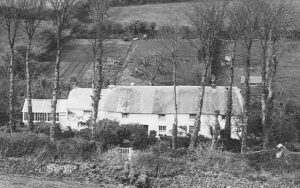
 Harmony Cot in 1905.
Thatching is the craft of building a roof with dry vegetation such as straw, reed or other material to shed water and keep the building dry. This article, by Tony Mansell, was written in conjunction with Master Thatcher Elijah Francis as he undertook the re-roofing work on Harmony Cot, Blowing House, Trevellas near St Agnes – the home of Cornish artist John Opie, back in the 1700s. It is not intended to be a Teach Yourself Thatching guide but to give some idea of the technique and complexity of this very traditional occupation.
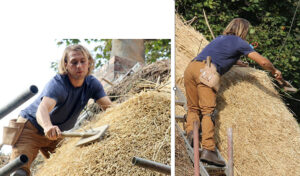
Elijah Francis, a St Agnes chap, was apprenticed for five years to a thatcher in Somerset. During his career he gained experience on many thatching projects both in working in a team and on his own, as is the case at Harmony Cot.
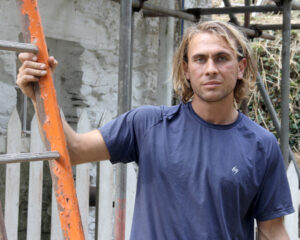 Elijah Francis (Photo: Tony Mansell)
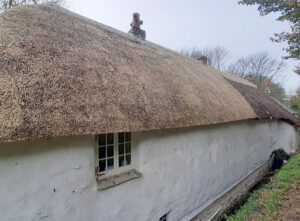
The usual method of thatching a roof is to tie a base layer, or undercoat, of straw to the roof substrate and then to fix the topcoat or layer of thatch directly to this base coat with spars. The straw or reed is usually laid in courses along the roof. At Harmony Cot however, with Elijah working on his own, and with the imperative to maintain the waterproof function of the roof during the course of the work, it was necessary to strip and re-thatch in vertical strips, as shown in the photos.
 (Photo: Chris Leest)
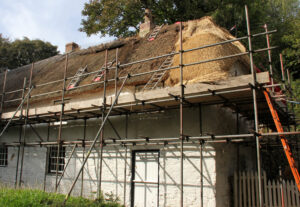
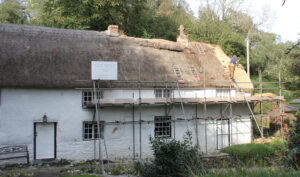
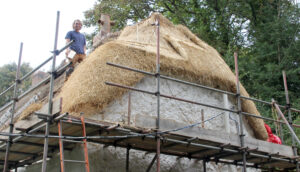 The rear has been completed and Elijah is working on the flying hip and along the front – from right to left. (Photo: Tony Mansell)
 (Photo: Tony Mansell)
 (Photo: Tony Mansell)
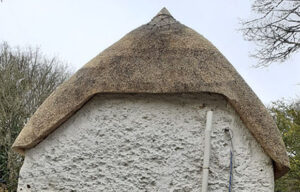 The finished end (Photo: Chris Leest)
For this project, Elijah used combed wheat straw from Devon – supplied by a merchant. He said, “It had been processed by a reed comer who threshed and combed it to remove the ears. It was then put into bundles and tied up with twine.”
It seems that in olden times, instead of threshing corn with a flail, women were employed to prepare the thatching straw by beating out the corn into a barrel.
 Tools of the trade: Leggett / Side Pins / Spar Hook / Mallett / Shearing Hook but as with any traditional occupation, the terminology and names of tools may vary from area to area. (Photo: Tony Mansell)
On delivery, the straw was sorted into smaller bundles (armfuls) and any flag and short straws removed (pitched out). The armfuls were cut to an even length (trimmed) and tied with straw (bind).
The armfuls of straw were then ready to be taken to the roof.
Removing and disposing of the old thatch is a laborious and dusty job but it has to be done and, luckily, Elijah had an outlet for it.
Elijah confirmed that no fire felt was used on this roof. He explained, “To include this the wooden roof rafters have to be exposed but with traditional wheat straw thatching, the base coat must remain, meaning that the rafter’s stay covered and fire felting is impossible.”
Once the old thatch was removed, a layer of fire felt was laid over the roof structure in readiness to receive the base coat of straw.
As mentioned earlier, a system of working in vertical sections (stalching) was adopted here so as to keep the roof watertight. This is an ideal method for a thatcher working on his own who may otherwise be caught out by unfavourable weather.
The Thatching:
The first layer of straw is laid (pitched) and dressed into place. Temporary side pins are inserted to keep the course in place and to avoid any sideways creep.
The top layer of thatch comprises courses of straw which overlaps the course below as the work progresses upwards (in principle, the same as slates or tiles). This lap aids waterproofing and hides the fixings which hold each course in place. Thus, only the top levelling course shows its line of fixings.
The thickness of straw must remain fairly constant at around 12 inches (300mm) whatever the type or length, of thatching material being used.
Hazel spars are used as permanent fixings for the top layer of straw. These are cut from a prepared length of willow or hazel wood (gad). Gads are cut in winter and split with the spar hook as they are then low in sap. The spars are pointed and soaked in water overnight. On the day of use, they are twisted at mid-length and bent to a “U” shape, like a large staple.
Achieving a waterproof covering is paramount but appearance is also important and the surface of the straw is trimmed with a shearing hook and tidied up using the Leggett, a hand tool used to drive the thatch into place to achieve a smooth line.
 Elijah using the Leggett. (Photos: Tony Mansell)
 A new ridge to the area of the roof not being replaced (Photo: Chris Leest)
Finally, the ridge is formed (anciently called the crease in Cornwall). It consists of a layer of combed wheat, bottoms up, on either side, merging together at the apex (butt up ridge). An alternative would be a layer of straw dressed down each side (wrap over).
As to the longevity of a thatch roof, Elijah said, “Good straw thatching, laid correctly, should last 18 years or more.”
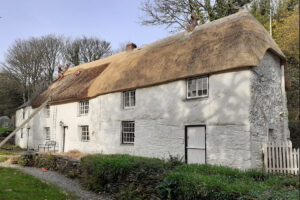
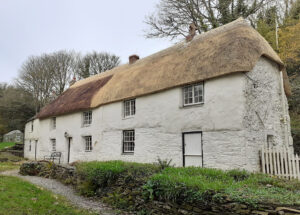 The scaffold is down, the work is finished and mighty fine it looks. (Photo: Chris Leest)
There is no doubting that there is a high degree of nostalgia about the remaining thatched cottages across the Cornish countryside. There is clearly a desire to retain them and to maintain them in good condition, enough for the craft to live on for many year to come.
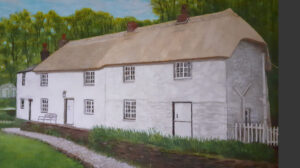 A painting of the finished job by Becky Leest, Elijah’s mother.
Article written by Elijah Francis and Tony Mansell